So about three weeks ago one of our fences in the back yard had a whole section collapse. The landlord next door co-ordinated the replacement and the new fence looks good:
Unfortunately, our gate, which was on its last legs and attached to the previous fence, did not handle the separation with grace...
I debated whether to get a quote or to do myself - but I had a three day weekend, so let us build a gate!
First of course, is the removal of the old gate and posts:
These posts literally slid right out of the ground:
Have a little wood rot with the replacement?
The other side literally broke off at ground level:
The gate also just almost fell out of its moorings:
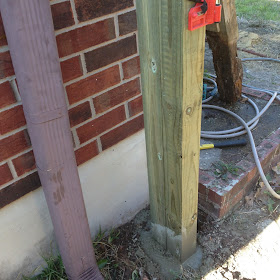
So now I started to place the two posts nearest to the house. First unhappy surprise: these posts were also concreted in place - and my posts were just a little bigger and would not fit.
This created some stress in my life. I have neither the tools to remove concrete nor the time to do so. I tried with a crowbar and hammer but got nowhere. Then I had an idea worthy of my friend Jambaloney: the new fence extended beyond where it had previously been so obviously they had sunk a new post hole. Why could I not do the same?
Progress went more quickly after that.
Placing the first two posts was fairly straightforward. I may not know a great deal about a great many things, but I spent three months with my father-in-law The Master Sergeant putting posts in place. A post, I can put up (I will spare you the boring details of mixing and setting the concrete):
I would show the others, but apparently I deleted them. Suffice it to say that the process was exactly the same (although I ran out of concrete and had to go to the Big Box Parts store for more).
Next was the part to attach the fence boards to. This was a challenge (at least for me) as the screws would not directly go in. I tried a drill bit (better, but not much so) then settled on a wood drill bit. It made the process go faster, although changing from bit to bit chewed up some time:
My second posts had not set so I could not do much else - and besides, it was nearing the end of the day:
Depending on the progress I make, we will either have a Part II or Part II and Part III to this. Overall tired and a bit sore, but satisfied with the progress today.


Isn't it amazing when you fix something, another piece fails or has something else broken? I think it is a conspiracy.
ReplyDeleteProject looks good, so far! Good job.
~hobo
Thank you very much! I am pleased with the progress so far.
DeleteAnd yes, I totally agree with the conspiracy theory. The same thing seems to happen with any "extra" money in the bank account...
Glad to read that the fence was eventually fixed. It is amazing to witness just how much damage wood rot can do. Hopefully, this fence will fare better than the previous one, although with those building skills, I guess there should be little doubt that it will. Good luck to you in the future and hope the fence holds!
ReplyDeleteThanks Garry! I am pretty happy with result - and realistically, I only need 6-8 years out of the fence and gates before we move on.
DeleteThanks for stopping by!